One evening, I found a curbed Samsung UN40J6200 – a 40″ 1080p TV. The panel looked to be in good condition, so I went ahead and took it.
After I got home, I tried to plug it up, and I could see it briefly light up, then go out. Clearly, its LED backlight was failed. I’ve done a number of these repairs in the past, so I’m no stranger to that procedure. To isolate the backlight as the issue, I took the back cover off, unhooked the backlight connector from the power supply, then plugged the TV back in. I shone a flashlight on it, and I could see the Samsung logo!
So, as far as I could tell, it looked like I had scored a good TV – just needed new backlights. I ordered some, then put everything off to the side.
The Beginning
Today (10/28/22, at the time of this writing), I decided that it was finally time to try and fix it.
First, a little information for those unfamiliar – the general procedure for LCD TV backlight replacement is to first remove the back cover, remove the screen bezel, carefully lift the LCD panel out, remove some diffuser lens sheets (which evenly distribute the light), then pull out the old and install new backlights.
I began to follow once again that procedure for this TV. After removing the LCD panel, I noticed that something looked a bit…odd. Behind the last diffuser sheet to remove, I saw the top-right looked a bit darkened. I figured maybe a backlight must’ve blown out – every now and then, you’ll see something like that. Though, it seemed a bit strange to notice that through a diffuser sheet.
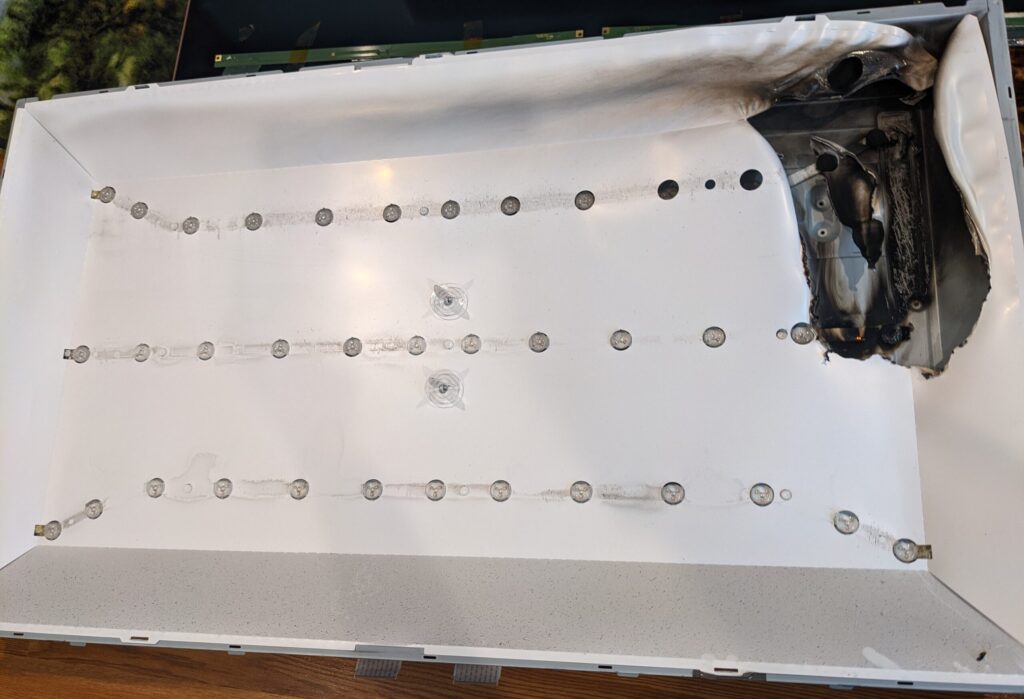
And boy, was I ever right about it having a good blowout – as soon as I removed the diffuser sheet, I saw that it had caught on FIRE! WOW!! I’ve never seen anything like this before. Since I’m of course not the original owner of the TV, I know nothing else about it than what I’m seeing here.
Damage Control
The rear diffuser sheet is quite obviously ruined – the top-right of it is missing a lot of its material entirely, and the thick sheet that goes over the pictured area, the last one I removed, had melted plastic and black burn marking all around. This seriously complicates the repair. I had come this far to replace the backlights though, so I wasn’t about to call it quits. It was clear that the first thing I needed to do, was to test the TV out with the new backlights I had ordered to make sure that the circuitry was OK.
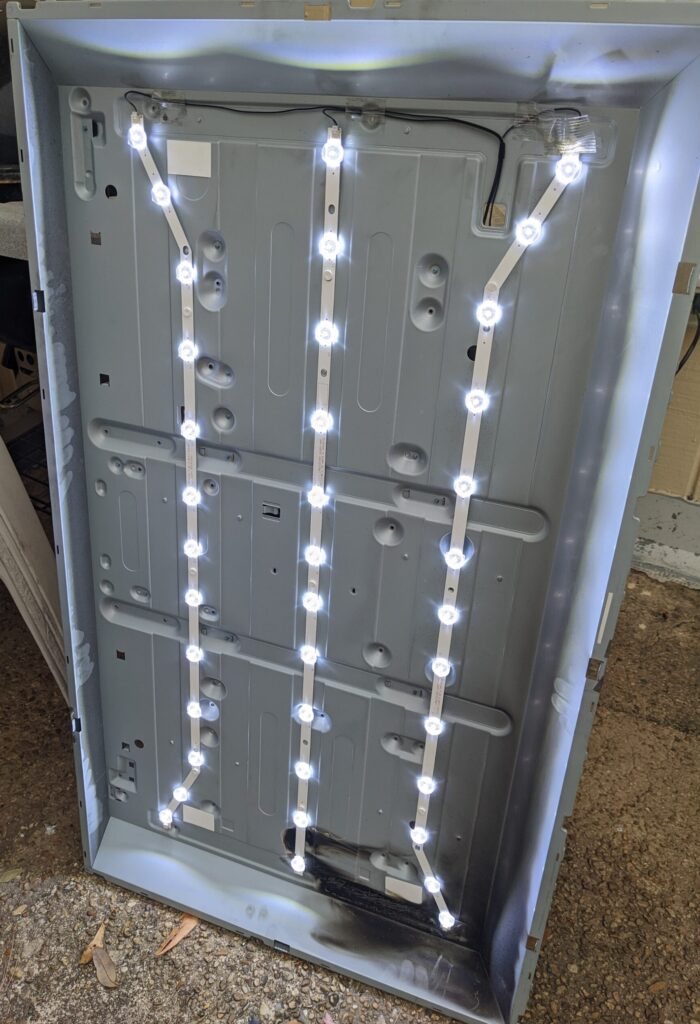
Fortunately, the power supply is good! It lit up without a hitch. That’s about what I expected. It’s clear that although that the LED backlight failed normally, and that all other electronics of the TV are okay, the power supply didn’t stop trying to power it. Thus, the LED got hotter and hotter, until it caught aflame.
My speculation is that, since the TV would initially flicker on briefly even just plugging it in, the power supply was going through a constant cycle of trying to start, noticing the short at the backlight circuit, then shutting off and trying to start again – all without user intervention. And from there, due to the repetition, and quite possibly also because that LED was quite distant from the wires (and therefore, higher resistance, thus meaning harder for the power supply to notice), the LED went up in flames.
It could’ve even happened with nobody watching it at the time! The TV may very well have blacked out during watching it, with the power supply cutting completely off, but it still kept trying to start up. Thus, leading to this ‘heated’ incident!
The next step was to go ahead and test the panel to make sure it looked good. After attempting to clean up the toasted frontal diffuser sheets as best as I could, I pieced the TV back together enough to keep the LCD panel safely in place.
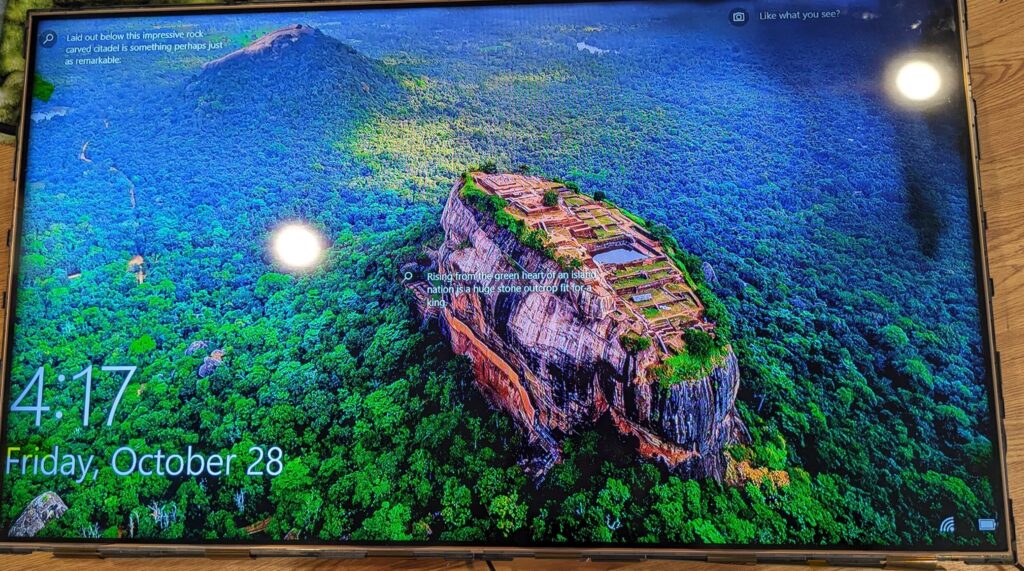
It works great! Thank goodness. This was the first time I actually saw it lit up – and indeed, the panel is perfectly fine. Beautiful, in fact! There’s just a couple dark spots where the panel isn’t being lit up. The panel itself is unscathed – it’s only the burnt frontal diffuser sheet causing this.
The Unlikely and Strange Solution
Although I now knew that the TV worked, the question remained – how can I get the dark spot out? I could sell the TV as-is, but I really wanted to fix this thing right. I didn’t want to go all this way just to have a partly-working result, even if it was better.
I soon remembered that I had a junk TV with a busted panel. Finally, a use for a busted TV – its diffuser sheets! Never something I thought I’d need, yet here we are.
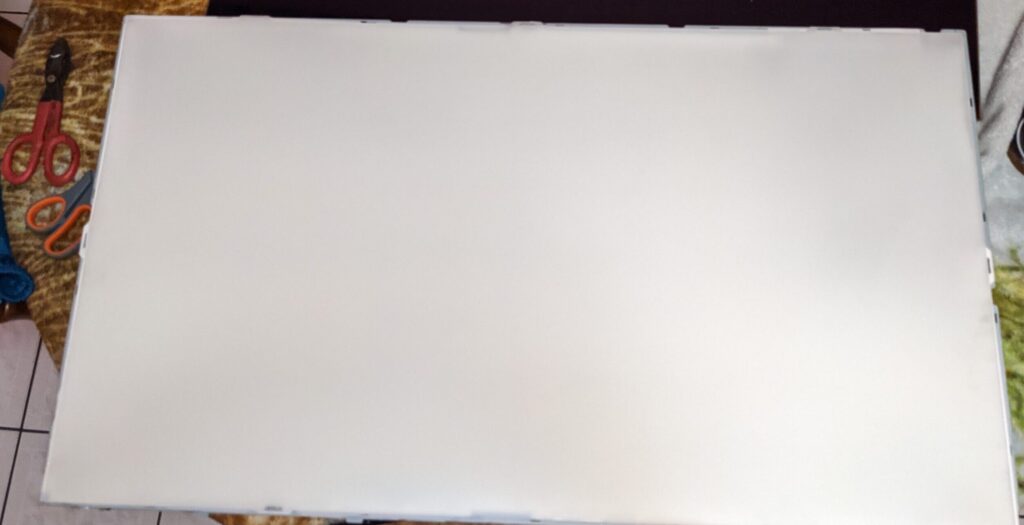
Unfortunately though, this TCL 43″ TV wasn’t the same size as this 40″ Samsung. This means larger diffuser sheets. The only way I could make this work was to actually cut the sheets down to size. This proved to be a tremendous pain in the rear – it’s way too thick for a razor blade, let alone scissors. The only way I was able to make this work was using tin snips to make several vertical cuts across the area to the depth of which I needed the sheet to be, then cutting or snapping off the sections between the cuts. The sheet shatters as you cut it – VERY messy and tedious work! Eventually, I got it down to a good enough size to fit within the frame.
For the rear diffuser, fortunately that was easy – I just cut away the charred and melted portions, then used sheets of paper to fill in the area. Now that I’ve got good diffusers, it was then time to install the LCD panel. I very carefully installed it, snapped on the outer LCD bezel, and then pieced it together…

Voila, a working TV! What a hassle it was, but my am I ever glad that it was a success. Not a bad unit! I wouldn’t want to do this over again, but I’m sure glad at least I was able to save this from being a total loss. Since the panel wasn’t damaged, this TV definitely deserved another lease of life – and that, it has been given.